|
| |
 Four
Stoke Findings for CLPA Four
Stoke Findings for CLPA
Reprinted from Flying Models-Used by
Permission
By
Bradley
Walker
Richardson,
TX
My
4-stroke development began in earnest in mid October 2001. Being that the
winters in Dallas are pretty mild, I felt that this would be perfect time to do
some experimentation with 4 cycle engines that Windy Urtonowski had recommended
in several of his Typhoon stunt videos. I had just completed surgery to
re-attach the lower tendon on my right biceps muscle so I was not able to fly
for myself in the beginning. Doug
Moon volunteered to be the team “mule”, a few old airframes were retrofitted
with the Saito 56 and 72, and we began our journey into “4 Stroke Land”.
The system that was actually refined in the winter has remained unchanged
and has performed exceptionally well through the hot summer, including a rock
solid performance at the 2002 Nationals (6th in Advanced).
To
date, all of our experimentation and development have been centered on the Saito
72 and 56. It is our plan to
develop the OS 52, OS 26, and YS 63 in the winter of 2002.
Considering this fact, all of the recommendations contained herein are
meant to serve as an overview of my introduction to ONE BRAND of 4-cycle engine
(Saito).
Recommendations
for the Use of the Saito 4 Cycle Engine for Stunt
1.
Which
Engine?-
My preferred engine is the Saito 72.
Our 4-cycle experimentation actually began with the Saito 56.
The Saito 56 appeared to be a reasonably powerful engine, but yielded a
stunt run that was somewhat “unconventional”.
The lap times were typically faster than the maneuver speeds. In effect, level laps were faster than a typical 2-cycle
engine and maneuver speeds were slower. This
would seem to bear out the stunt runs that were reported from friends in the
Northwest who were utilizing the Saito 56 almost exclusively. Considering the
size and weight of our test airplanes (650 Sq in-60 to 65 oz), the Saito 72,
almost immediately, appeared to be superior to the Saito 56 in every way.
It was evident from the first run that the Saito 72 was more capable of
producing a huge SURPLUS of power over a wider RPM range, and with a larger
selection of props. It was my
initial goal to find a 4-cycle engine that would match the output of the mighty
PA 65. It took the added
displacement of the Saito 72 to achieve this goal (this would correlate exactly
to the manufacture’s recommendations). The
only detraction of the Saito 72 over the Saito 56 is an added 2 oz of engine
weight. These two engines actually bolt into the same holes. The weight penalty,
however, appears to have no detrimental effect at all (more on that later).
From personal observation I
would say that the Saito 56 is most closely matched to a model in the 55 oz
range. The Saito 72 is more closely
matched to the 65 to 75 oz ranges.
2.
Venturi
VS Carburetor-
initial testing with both engines was started using the stock carburetor
controlled by a pushrod contraption that I designed. 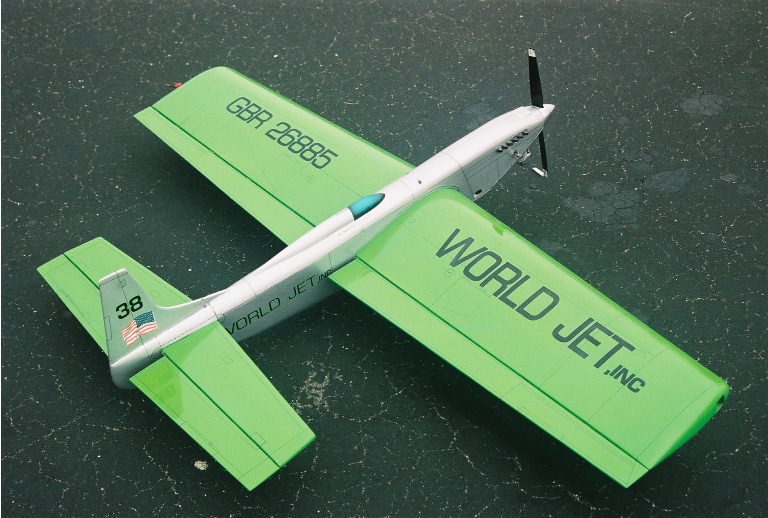 This
setup did have the capability to change RPM via the throttle for each flight,
this proved very handy for trying different props.
While this setup did work, and I would not hesitate recommending starting
with the carburetor for the sake of experimentation, the setup that finally
proved to be utterly reliable was the utilization of the Pat Johnson manifold
with OS Max FP venturi. I have
broken-in a lot of these Saito engines on the bench in the last year (one gallon
per engine). Since Saito recommends
that their engines be broken in at low RPM (utilizing the throttle), I have
spent a lot of time to listening to these engines run with the carburetor in a
fixed position (the one gallon of break-in takes about 4-5 hours run time). I can now say with all assurance that the carburetor does not
run as well as the venturi at full load. This
would seem to bear out what we have for in-flight testing also.
The carburetor, even when held rigidly, appears to sputter, pop and
misfire, even though the effect IS VERY SUBTLE.
The carburetor never exhibited the DROP DEAD in-flight and run-to-run
reliability of the venturi setup. This
appears to agree with opinions that have been shared with me by the flyers
running some the 4-cycle engines on the West Coast. This
setup did have the capability to change RPM via the throttle for each flight,
this proved very handy for trying different props.
While this setup did work, and I would not hesitate recommending starting
with the carburetor for the sake of experimentation, the setup that finally
proved to be utterly reliable was the utilization of the Pat Johnson manifold
with OS Max FP venturi. I have
broken-in a lot of these Saito engines on the bench in the last year (one gallon
per engine). Since Saito recommends
that their engines be broken in at low RPM (utilizing the throttle), I have
spent a lot of time to listening to these engines run with the carburetor in a
fixed position (the one gallon of break-in takes about 4-5 hours run time). I can now say with all assurance that the carburetor does not
run as well as the venturi at full load. This
would seem to bear out what we have for in-flight testing also.
The carburetor, even when held rigidly, appears to sputter, pop and
misfire, even though the effect IS VERY SUBTLE.
The carburetor never exhibited the DROP DEAD in-flight and run-to-run
reliability of the venturi setup. This
appears to agree with opinions that have been shared with me by the flyers
running some the 4-cycle engines on the West Coast.
My
venturi setup for the Saito engine is as follows:
- Pat
Johnston Manifold-a
beautiful and simple
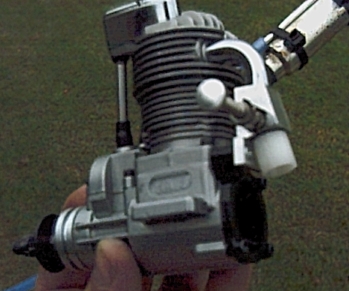 little
device that replaces the stock carburetor and allows a stock OS FP venturi
to be inserted
utilizing the standard “spray bar through the venturi” arrangement.
When I first started in the 4-stroke program, Pat was manufacturing
the manifolds himself (he is quite good at it). Since then, the manufacture of the manifolds has been
passed to Ultra Hobby Products. I
helped develop the UHP version with Dallas toolmaker Dirk Tolendaar.
We took the original design and cleaned up some of the machining
and added an o-ring seal to the carburetor downtube so that no silicone
was needed for installation. The manifold is sold as a complete kit with
everything needed to convert your Saito 56 or 72 into a stunt engine.
This includes the manifold with new mounting screws, three
venturi’s (.265”, .275” and .285”), and an OS Max 40 FP style
needle valve. The cost for
the package is $60.00. little
device that replaces the stock carburetor and allows a stock OS FP venturi
to be inserted
utilizing the standard “spray bar through the venturi” arrangement.
When I first started in the 4-stroke program, Pat was manufacturing
the manifolds himself (he is quite good at it). Since then, the manufacture of the manifolds has been
passed to Ultra Hobby Products. I
helped develop the UHP version with Dallas toolmaker Dirk Tolendaar.
We took the original design and cleaned up some of the machining
and added an o-ring seal to the carburetor downtube so that no silicone
was needed for installation. The manifold is sold as a complete kit with
everything needed to convert your Saito 56 or 72 into a stunt engine.
This includes the manifold with new mounting screws, three
venturi’s (.265”, .275” and .285”), and an OS Max 40 FP style
needle valve. The cost for
the package is $60.00.
FYI:
Pat Johnston is
truly one the nicest guys I have ever met in stunt, and has been tremendously
supportive of my puny efforts. Please,
don’t hesitate to contact him. At
present he is wringing out the Saito 56 quite nicely and has lots of interest in
the findings of others.
3.
Venturi-
The venturi that I started with, in the winter of 2001, was the stock OS Max 40
PF venturi “large” (.285” opening). This
is would be the large #3 venturi included in the Ultra Hobby Products manifold
set. (Note:
You might need to use the #2 venturi (.275”) with the UHP set, as the
OS FP needle valve has a smaller cross section than my OS 35-S needle valve).
I assumed at the time that the thinner summer air would most likely require a
larger opening, but this has never proven to be true. I tried several larger venturi sizes as the temperature began
to change, but never liked the results. Changing
to a larger venturi only served to increase the speed of the airplane, but not
necessarily the power (compensations for
temperature are made using nitro content-discussed later under fuel).
Comparing notes with Pat Johnston in Idaho, he has been running the same size
venturi on the Saito 56. Jim Aaron
was also using the same size venturi (.285”-with ST 60 needle valve assembly)
in his Saito 56 at the 2002 Nationals in Muncie.
Once his airplane was converted to the “Dallas setup” his Saito made
great power all week. This being
said, it would seem obvious to me that the torque of the Saito engine works very
effectively at lower RPM’s. I
stay between 8500 and 9200 RPM, depending on the propeller.
I have found 8900 to 9200 to be optimum.
4.
Needle
valve- I am
currently using the old OS Max 35-S needle valve assembly.
This needle has the same cross section as the typical ST type needle
valve, but is of the “click” variety. A
ST type needle could be readily substituted (look for the drop in replacements
for the OS Max FP type engine available from Tom Dixon, RSM, etc).
The Ultra Hobby Products manifold kit includes the newer OS FP type
needle which is identical to the needle I use, but has a smaller cross section
and a finer thread on the needle. I
opted for the OS Max needle because I have always liked the “clicks”
available with the OS Max type needle. I
feel that the “click” method of fine tuning the engine is the most
consistent. The advantages of this type of needle will be discussed in
the tuning section.
5.
Fuel-
There are special considerations when selecting a fuel for a 4-cycle engine.
Several discussions with RC flyers, and my own experience, have shown me
that the typical approach that we stunt flyers take to fuel could POSSIBLY have
a detrimental effect on the 4 cycle run. Typically,
our 2-cycle stunt fuel has very high oil content, the effect being that it is
advantageous to take heat out of the engine to maintain the classic “four
stroking” run. Since a 4-cycle
engine only fires every other stroke, it can be detrimental to take heat out of
the cylinder too rapidly. Low
cylinder heat has a tendency to “blow the plug out”, especially in high G
maneuvers. This again, correlates
to the information gleaned from the RC flyers that I have spoken to that have
been running 4-cycle engines for almost 15 years.
Basically, most of these RC flyers avoid castor oil in all of their
4-cycle engines. To this end, I
began utilizing fuel that was developed specifically for 4 stroke engines in RC
Pattern, which is an all-synthetic oil blend with slightly higher nitro content
than we would typically see used for 2-cycle stunt.
The
first fuel that produced exceptionally good results was Powermaster YS 20/20. This fuel is 20% synthetic oil and 20% nitro.
Of
all the fuels I have tried of various blends, no other fuel really came close to
the Powermaster YS 20/20. In particular, the Saito 72 seems extremely
happy on this blend and exhibits all of the traits that are beneficial for
stunt. It appears to be a drop-in
improvement to any Saito 4 stroke setup. I
switched Jim Aaron’s Saito 56 to the Powermaster YS 20/20 at the Nationals and
there was an immediate improvement in the running characteristics of the engine.
The representative from Powermaster that I spoke with at the Nationals
said that Horizon Hobby (the Saito distributor for the Americas) highly
recommends their Powermaster YS 20/20 fuel.
Also, Powermaster has been very consistent fuel and I have been extremely
impressed with Powermaster’s factory support for CLPA.
So, all that being said, I now use the Powermaster YS 20/20 for normal
conditions and 30/20 for extremely hot conditions in Dallas (I required no 30/20
at the Nationals).
My
Saito 72 uses approximately 4 oz of fuel to complete the pattern using
Powermaster YS 20/20. 4 ¼ oz are
required for 30/20. The Saito 56
will use closer to 3 ¼ oz of fuel. This
type of excellent fuel economy overrides the higher cost of high nitro fuel.
Second
to the Powermaster YS 20/20, I would recommend the Rich’s Brew YS 20/20.
At the recommendation of Bill Bischoff, Dallas’ nationally renowned
Carrier guru and local hobby shop guy, I tried the Rich’s Brew version of YS
20/20. This has proven to be good
fuel. The engine does not produce
quite the RPM that the Powermaster equivalent does, but the capability to needle
the engine with this fuel appears to be very, very good (this is MUCHO
important-this will be discussed further in the tuning section) and the price is
about $5.00 a gallon cheaper. Another
possible advantage to the Rich’s Brew line is that it is available in 25/20
and 30/20, with the oil mix left the same and the nitro increased.
I use Rich’s 50/20 Magnum fuel mixed 2 to 1 with the Powermaster YS
20/20 to make my hot weather 30/20.
Sig
Champion 15% fuel also appears to needle quite nicely and produce smooth runs
but never really had the superior characteristics of the Pattern based synthetic
oil fuels.
Long
story short, I feel there are several fuels that may work exceptionally well in
the 4-cycle for stunt use, the most important factor is how they run in the
engine (DUH). I will attempt to
explain how to determine if your fuel is correct in the “tuning” section. Also, nitro is good. Higher
nitro in the 4 cycle has none of the ill effects demonstrated by 2 cycle stunt
engines. Nitro just makes the
engine run BETTER. It even stunts
better. I much prefer adding nitro
to opening the venturi for more power. One
interesting effect is that I rarely touch the needle valve switching between
20/20 and 30/20 in subsequent runs.
6.
Glow
plugs- at the
recommendation of Windy and his 4-cycle videos, and Bob Zambelli (and just about
every 4-cycle RC flyer I spoke to) I began running the Saito on the OS Max
“F” plug. I recommend this plug highly. If
all else fails use this plug. One
of my favorite plugs for 2-cycle engines has always been the Sonictronic RC-300.
 Randy
Smith of Aero Products turned me on to Sonictronic more than ten years ago and I
ran a WHOLE bunch of these plugs over the years and NEVER had a bad one.
To this end, once I learned that Sonictronic was producing two new
4-cycle plugs, a call was made to Mr. Hankinson (President of Sonictronic) who
was nice enough to give me four plugs for testing.
Being an old control line flyer, he was interested enough in our hobby,
and what we thought of his product, to “COMP” me the plugs.
I have tested their two different plugs.
There is one version made specifically for the Saito and Enya, and
another that is designed specifically for the OS Max (it appears to be an exact
copy of the OS Max “F” plug). The
Saito version ran very well and never gave me any trouble, I would recommend it
highly. The Sonictronic copy of the
OS Max type “F” is now my favorite plug.
It appears to be superior to the OS Max for retaining heat (and that is
saying something) and equal to the OS Max for reliability.
Considering that the Sonictronic version of the “F” plug appears to
be equal to or superior to the OS Max, it is an exceptional value at $5.00 and
some change (half of the Hobby Shop price of the OS Max at about $10.00 and
change). Randy
Smith of Aero Products turned me on to Sonictronic more than ten years ago and I
ran a WHOLE bunch of these plugs over the years and NEVER had a bad one.
To this end, once I learned that Sonictronic was producing two new
4-cycle plugs, a call was made to Mr. Hankinson (President of Sonictronic) who
was nice enough to give me four plugs for testing.
Being an old control line flyer, he was interested enough in our hobby,
and what we thought of his product, to “COMP” me the plugs.
I have tested their two different plugs.
There is one version made specifically for the Saito and Enya, and
another that is designed specifically for the OS Max (it appears to be an exact
copy of the OS Max “F” plug). The
Saito version ran very well and never gave me any trouble, I would recommend it
highly. The Sonictronic copy of the
OS Max type “F” is now my favorite plug.
It appears to be superior to the OS Max for retaining heat (and that is
saying something) and equal to the OS Max for reliability.
Considering that the Sonictronic version of the “F” plug appears to
be equal to or superior to the OS Max, it is an exceptional value at $5.00 and
some change (half of the Hobby Shop price of the OS Max at about $10.00 and
change).
Sonictronic
plugs are available directly from the manufacturer:

It
is my hope that our CLPA “cottage industry” dealers will take the
opportunity to carry these plugs. I
find it refreshing that Sonictronics is interested in the needs of the CLPA
community.
All
of the other plugs mentioned are available at your local hobby shop.
7.
Tank-
Testing originally started on the Saito 56 utilizing a standard 4” GRW uniflow
stunt tank. This tank really did
not function well enough for pattern flying until the rear of the tank was
cocked at the maximum angle inside the fuselage, as the performance of the
engine at the latter portion of the pattern was non-existent. After this mod, we were actually able to put in patterns, but
performance at the latter portion of the flight really was suffering.
Shutoffs and fuel consumption were erratic at best.
Overhead performance was generally pretty poor.
 Muffler
pressure seemed to not help or hurt the run.
Tank shimming for inside and outside speeds was very critical.
Upon switching to the Saito 72, the same tank was utilized for the first
few sessions. It became quickly
apparent the 4” tank would not be large enough for the Saito 72.
Considering the space available for the tank in the nose of the test
airplane, it was decided to try a 6 oz clunk tank.
I bought a DuBro 6 oz tank at the local hobby shop for $3.50 and plumbed
it upside down (with the bulbous part toward the motor beams).
The clunk and
overflow was fashioned in the standard manner and the vent line was bent to the
most inboard front of the tank, as per the standard setup utilized for piped
engines in Dallas. This vent
arrangement creates a true non-uniflow effect.
I only have one way to describe the clunk tank’s effect, WOW!
I can honestly say that before the clunk tank I was ready to give up on
the 4-cycle. Everything was fixed
in one fail swoop. The engine now
ran through the entire pattern and usually only changes speed about .1 seconds
of lap time through the entire run (depending on the prop, sometimes there is no
real change). The engine ran the
same straight overhead as it did in level flight, and performance at the end of
the pattern was as good as at the beginning.
The shutoff is
downright spooky! The engine just
shuts off. Most of the time there
are no beeps at all. Also, one more
thing, the lap times slowed down .2 of a second (with prop #1). No lie! Before
the clunk and suction vent arrangement, we were seeing the “fast level lap”
phenomenon. Fast level laps, slow
maneuvers. After the addition of
our clunk tank the run became very “conventional”. Muffler
pressure seemed to not help or hurt the run.
Tank shimming for inside and outside speeds was very critical.
Upon switching to the Saito 72, the same tank was utilized for the first
few sessions. It became quickly
apparent the 4” tank would not be large enough for the Saito 72.
Considering the space available for the tank in the nose of the test
airplane, it was decided to try a 6 oz clunk tank.
I bought a DuBro 6 oz tank at the local hobby shop for $3.50 and plumbed
it upside down (with the bulbous part toward the motor beams).
The clunk and
overflow was fashioned in the standard manner and the vent line was bent to the
most inboard front of the tank, as per the standard setup utilized for piped
engines in Dallas. This vent
arrangement creates a true non-uniflow effect.
I only have one way to describe the clunk tank’s effect, WOW!
I can honestly say that before the clunk tank I was ready to give up on
the 4-cycle. Everything was fixed
in one fail swoop. The engine now
ran through the entire pattern and usually only changes speed about .1 seconds
of lap time through the entire run (depending on the prop, sometimes there is no
real change). The engine ran the
same straight overhead as it did in level flight, and performance at the end of
the pattern was as good as at the beginning.
The shutoff is
downright spooky! The engine just
shuts off. Most of the time there
are no beeps at all. Also, one more
thing, the lap times slowed down .2 of a second (with prop #1). No lie! Before
the clunk and suction vent arrangement, we were seeing the “fast level lap”
phenomenon. Fast level laps, slow
maneuvers. After the addition of
our clunk tank the run became very “conventional”.
I have since switched to the
Sullivan “square” 6 oz clunk. The
performance on inside vs. outside maneuvers proved to be superior with the
Sullivan. The vent line is plumbed
to the center front inboard corner of the tank.
The tank shim is approximately 1/8” off the beams if using the Ultra
Hobby Products manifold (for both the Saito 72 and 56).
I use UHP “Moon Pads” under my engine, these pads are slightly
thicker than 1/8” and my tank shim is ¼”.
I have come to the conclusion
that the 4 cycle just does not work well, or REQUIRE uniflow venting. There are no advantages to uniflow venting, because the
engine does not speed up excessively through the pattern with a suction
arrangement. The only thing I see
uniflow doing is making the engine go IMMEDIATELY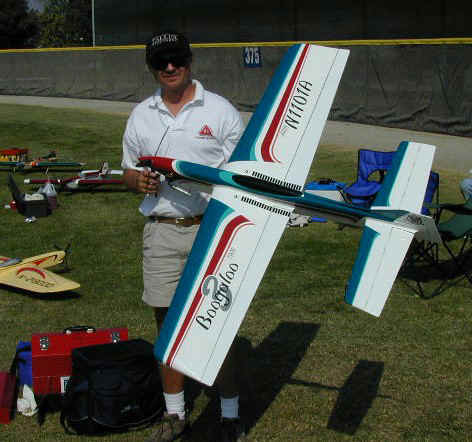 over-lean the second the nose is pointed up.
I observed this in Jim Aaron’s setup while we were practicing on the
grass early in the week in Muncie. I
really felt bad for Jim, as I noticed that he was really struggling and was
definitely not pleased with his choice to show up to the Nationals with a Saito
4 cycle. Well, that was completely
unacceptable! Jim was using the
metal uniflow tank that he had used with his PA pipe engine.
I explained that the engine would never perform on that tank.
It was evident from takeoff that the engine was unloading to over-lean
the second it took off. It got even
worse when he pointed the nose up or took the plane overhead. Finally, Ted Fancher convinced Jim to try my tank.
A quick trip to Muncie Hobby Shop, with a little counter-top fabrication
yielded an exact duplicate of my tank. The
tank was set at the same shim as mine, the tank was filled with some
complimentary Powermaster YS 20/20, the needle set to max RPM and BOOM!
Stunt heaven. Jim was
smiling all week.
over-lean the second the nose is pointed up.
I observed this in Jim Aaron’s setup while we were practicing on the
grass early in the week in Muncie. I
really felt bad for Jim, as I noticed that he was really struggling and was
definitely not pleased with his choice to show up to the Nationals with a Saito
4 cycle. Well, that was completely
unacceptable! Jim was using the
metal uniflow tank that he had used with his PA pipe engine.
I explained that the engine would never perform on that tank.
It was evident from takeoff that the engine was unloading to over-lean
the second it took off. It got even
worse when he pointed the nose up or took the plane overhead. Finally, Ted Fancher convinced Jim to try my tank.
A quick trip to Muncie Hobby Shop, with a little counter-top fabrication
yielded an exact duplicate of my tank. The
tank was set at the same shim as mine, the tank was filled with some
complimentary Powermaster YS 20/20, the needle set to max RPM and BOOM!
Stunt heaven. Jim was
smiling all week.
If I have one thing to offer from
all this to the other 4-cycle people, try my
clunk tank.
8.
Propellers-
To date, I have been using mostly large wooden propellers that are substantially
reworked Zinger 14-5’s. I never
had much use for Zingers in the past (for use on the ST 60).
I typically opted for the
Rev-Up or the BY&O propellers, but since my supply of both of these other
brands of props dried up at my local hobby shop, I opted for the Zinger.
The Zinger is a pretty nice HUNK of wood (Bill Bischoff calls them
“prop kits”). Initial runs with
the Saito 72 were actually made with stock 13” props of various makes.
While these props proved to be less than optimal, I would have no
hesitation to recommend these props to the average stunt flyer that might not be
interested in reworking props. A
Saito 72 with a stock 13-5 or 13-6 BY & O, Zinger, Rev-UP, APC, or Master
Airscrew is still a pretty nice rig. (The
APC 12-6 appeared to work nicely on the Saito 56, as well as the stock Bolly
13-6). Basically, the seven props I
have produced so far are variations on a central theme.
I have found that the real key to the Saito 72 performing in various
conditions and producing very steady speed is not overdo the pitch in the last
1” of the prop (station 14 on a 13” to 14” prop). Tip pitch is like nitrous oxide to the 4-cycle, the corner
acceleration (and arm numbing line tension) that can be had with just a ¼ more
pitch in the tip is INCREDIBLE. This, I believe, shows the real power of the big
4-cycles over the 2-cycle. The
4-cycle does not easily become bogged down, it just powers through.
In short, HOLD ON TIGHT if you plan to run a lot of pitch at the tips
outside of my recommendations. Following
the lead of Al Rabe and Bill Rutherford, I started clearly marking my props at
every-other-station starting at station #4.
This makes it very easy to change props at the field and know immediately
the desired effect, as the pitches are clearly written on the back of the prop. As I said, my props are pretty well worked down.
After the prop has been pitched to whatever variation I choose (I try to
buy props that are pretty darn close to begin with) the airfoil is reduced about
30% and all of the machine-made inadequacies are removed from the back of the
blade. II use a Black and Decker
Mouse Sander-this is also quite good for re-pitching wood props because of the
pointy tipped nose. The object here
is to thin and shape the prop to a true airfoil of some kind.
I use a set of calipers to measure thickness at each marked station,
thereby assuring some semblance of consistency.
The rest is just feel. The
hubs are not reworked as I have found that the 2 ½” spinner that I use with
the Saito just covers the hub anyway. The
tips are rounded in a conventional way and blade widths are kept at stock, for
the most part.
Target
thickness the prop blade is as follows:
- Station
4-.20”
- Station
6-.20”
- Station
8-.183”
- Station
10-.168”
- Station
12-.14”
- Station
14-.10”
These,
again, are targets. Al Rabe told me
he goes slightly thinner than I do. Some
variation on this theme might not be a bad idea, but these numbers will get you
close to what I am CURRENTLY using, which works pretty well.
Interestingly, these dimensions are nearly identical to the stock Rev-Up.
Prop
pitches as I stated before are variations on theme that began with prop #1.
I have found that pitches in the stations #4 and #6 have no real effect,
so I usually do not touch them. The
model speed and LOAD on the engine are found in station #8, #10 and #12. Acceleration, good or bad is found in station #14.
All prop pitches will be stated in the form Station #4, #6, #8, #10, #12,
#14.
The
pitches of my props thus far are as follows:
·
Prop
#1 (5.5, 5.5,
5.5, 5.5, 5.25, 5.25)- This prop measures 13.75” and was, as you can see, the
original prop that I made. The
diameter was modified after a bad takeoff.
This prop has functioned as a good benchmark, but has limited use.
This prop is EXCEPTIONALLY good in dead air on a heavy model.
The tip pitch of 5.25 has proven to be slightly excessive, and will
accelerate wildly in high winds. It
does however; produce much NEEDED acceleration in excessively calm conditions
with a portly model. Ground RPM
with my fuels is about 8400-8500 RPM. Lap
times are a slightly quick 5.1 to 5.2 seconds on 70’ lines.
Corner acceleration can lead to a somewhat heavy feel in hard corners.
Line tension is actually somewhat excessive for scribing perfect
patterns, except in dead air. Still a good prop. If
you feel you need this application, leave the diameter at a full 14”.
·
Prop
#2 (5.5, 5.5,
5.25, 5.25, 5.0, 5.0)- This prop measure 14” and is the best prop I have made
if you chose to fly on lines that are 67’ to 68’. At this line length the lap times are about 5.4, at 70’ the
lap times are 5.6 to 5.7 which is too slow for my tastes (you might like that
speed). Line tension with this prop
is lighter, but on a well-trimmed model in the 60 oz range, this prop is
“stunt heaven” in just about every condition imaginable. Speed in the corner is very conventional and windup is almost
non-existent. Ground RPM is 8700 to
almost 8900.
·
Prop
#3 (6.0, 6.0,
5.5, 5.25, 5.0, 5.0)- this prop measures 13.5”. The jury is till out on this prop on 70’ lines.
This prop was originally intended as a smaller diameter version of prop
#2. The idea was to allow the
engine to turn more RPM with the lower pitch on 70’ lines.
The load is quite mild, for that reason I could suggest this prop as a
starting place for a new motor.
·
Prop
#4 (6.0, 5.5,
5.25, 5.25, 5.25, 5.0)- this prop measures 14”. This was my first really good prop for all conditions on
70’ lines. Lap times were 5.4 to
5.3 (right in my pocket). Line
tension was just about right everywhere, all the time.
The original prop #4 and was replaced with an identical #7.
I would recommend this prop for a 60 oz to 65 oz model on 70’ lines in
just about any conditions. Very
good wind prop. Very powerful in the corners, without too much power.
Ground RPM was around 8700 RPM. This
is the prop I ran all week at the 2002 Nationals. As of right now, this is the
prop I would first recommend for competition.
·
Prop
#5 (6.0, 6.0,
5.5, 5.5, 5.5, 4.75)- this prop measures 14”. As you can see, I took my
assertions on the pitch to a little bit of an extreme compared to #4.
This did appear to pay off. Lap
speeds are 5.5 on 70’ lines. Line
tension is very even everywhere in the hemisphere and windup is vastly improved.
The motor is loaded more with this prop than you might think, and ground
RPM is slightly below 8500 RPM. The
high load creates a very clean, hot burn in engine, and as result the engines
barely varies in speed anywhere in the pattern. The low pitch at the tips controls the windup and the forces
in the corner. This prop is pretty
good on my 68 oz model on 70’ lines (don’t ask about the excessive weight,
the poor guy is doing the best it can) but I guarantee this prop will be AWESOME
on my new 60 oz model. The only
advantage to this propeller is the extremely powerful run required to run it,
due to the excessive pitch load. Try
some 30% nitro on a 65 oz model.
·
Prop
#6- 14” Rev-up
with the same pitch as #1 (stock Rev-Up 14-6).
See explanation of prop #1. This
was an attempt to try a Rev-Up. Good
bolt on solution to start.
·
Bolly
14-6 2 blade-
This prop actually comes 14.25” long and was a pleasant surprise. Trimmed to
14” it performs equally well with less load on the engine.
I would buy one of these, take it out of the package, balance it, and
bolt it on. It actually outperforms
my best wood props. I would have
been running this prop in Muncie, but alas…
By
the way, I tried my PA 65 prop ONCE, in an attempt to test the “high RPM-low
pitch-super efficient prop” approach. Let’s
just say, it was a miserable failure. The
valves floated horribly and the engine shut off after two laps.
I do, however, hear through the grapevine that Brian Eather is working on
four stroke carbon props right now (Jim Aaron had one on his Saito 56 at the
Nats, it worked quite well). My
guess is that they may have a vastly different appearance than the current stock
of piped engine props. I can’t
wait to see (that boy makes some COOL props-so does Bolly for that matter).
-
Tuning-
When I first started with the 4-cycle I set a lot of bad needles, and
watched a lot of bad runs (sorry Doug).
 My only
bad runs to this day are when I cannot find the needle (this will be
explained). I will attempt to
sum up my philosophy on how to set the needle for my setup (YOU MUST USE MY
TANK). Make the prop go as fast
as it will go. Always start
with PEAK RPM. The tank richens
the motor just the right amount, there is no reason to richen the engine on
the ground. This is one of the
reasons that the Saito 72 has been such a pleasure to practice with.
The peak is always the peak. Usually the needle is set on the first flight, and if I choose
to run the same prop all day, with the same fuel, the needle is seldom
touched again. I seldom TACH
twice, unless I am fiddling. To
set the needle, start the engine and use a tach.
Richen the needle until the engine starts to slow down, only 5-6
clicks are needed. Now that the
engine is running slow, turn the needle in, one click at a time and watch
the tach. Go slow; let the
engine change speed slowly. Pay
close attention with your ear, it doesn’t take too long to learn to
“hear” a 4-cycle. Watch for
a peak RPM. You will know when
you have gone too far because on the other side of the peak the RPM will
drop off slowly. Now you are
couple clicks overlean. Back
out the needle one click at a time, resting between clicks and watching the
tach. The RPM should go right
back up, another ten seconds of fiddling in this couple click range and you
will find the peak. Go slow.
If your engine will not show you a predictable 1-2 click peak and you
see the tach bouncing around a lot in a 5-6 click range, YOU HAVE THE WRONG
FUEL. When the engine likes the fuel and plug you are using, it
will show you this peak, plain as day.
Do this on the bench at home. If
you miss the needle by 5-6 clicks, you will have a long day at the field.
From peak RPM I vary either one click in, or one click out depending
on the prop, on subsequent runs. One
click rich will slow the lap times about .1 seconds, again, depending the on
the prop, and will allow more acceleration in the wind.
One click overlean can actually kill some of the acceleration in the
wind. All of this is basically true, if you run pressure to the
overflow. With pressure to the
tank, the ground RPM (peak) will appear to be at peak in the air.
My experiments with non-pressure proved it to work just fine, but
setting the needle was more difficult, engine would go slightly rich after
takeoff due the ram air effect at the overflow.
This forced me to run the needle leaner 2-3 clicks on the ground to
get peak RPM in the air. If no pressure is desired, I suggest venting the tank
to the inside of the fuselage. This
may stop the richening in the air. For
me, it is just so easy to vent the tank to pressure. My only
bad runs to this day are when I cannot find the needle (this will be
explained). I will attempt to
sum up my philosophy on how to set the needle for my setup (YOU MUST USE MY
TANK). Make the prop go as fast
as it will go. Always start
with PEAK RPM. The tank richens
the motor just the right amount, there is no reason to richen the engine on
the ground. This is one of the
reasons that the Saito 72 has been such a pleasure to practice with.
The peak is always the peak. Usually the needle is set on the first flight, and if I choose
to run the same prop all day, with the same fuel, the needle is seldom
touched again. I seldom TACH
twice, unless I am fiddling. To
set the needle, start the engine and use a tach.
Richen the needle until the engine starts to slow down, only 5-6
clicks are needed. Now that the
engine is running slow, turn the needle in, one click at a time and watch
the tach. Go slow; let the
engine change speed slowly. Pay
close attention with your ear, it doesn’t take too long to learn to
“hear” a 4-cycle. Watch for
a peak RPM. You will know when
you have gone too far because on the other side of the peak the RPM will
drop off slowly. Now you are
couple clicks overlean. Back
out the needle one click at a time, resting between clicks and watching the
tach. The RPM should go right
back up, another ten seconds of fiddling in this couple click range and you
will find the peak. Go slow.
If your engine will not show you a predictable 1-2 click peak and you
see the tach bouncing around a lot in a 5-6 click range, YOU HAVE THE WRONG
FUEL. When the engine likes the fuel and plug you are using, it
will show you this peak, plain as day.
Do this on the bench at home. If
you miss the needle by 5-6 clicks, you will have a long day at the field.
From peak RPM I vary either one click in, or one click out depending
on the prop, on subsequent runs. One
click rich will slow the lap times about .1 seconds, again, depending the on
the prop, and will allow more acceleration in the wind.
One click overlean can actually kill some of the acceleration in the
wind. All of this is basically true, if you run pressure to the
overflow. With pressure to the
tank, the ground RPM (peak) will appear to be at peak in the air.
My experiments with non-pressure proved it to work just fine, but
setting the needle was more difficult, engine would go slightly rich after
takeoff due the ram air effect at the overflow.
This forced me to run the needle leaner 2-3 clicks on the ground to
get peak RPM in the air. If no pressure is desired, I suggest venting the tank
to the inside of the fuselage. This
may stop the richening in the air. For
me, it is just so easy to vent the tank to pressure.
10.
 Starter-You
will need an electric
starter if you choose to pursue the use of the 4-cycle.
Hand flipping
a 4-cycle is tricky at best, especially if you like muffler pressure (or the
nose of your airplane to remain attached to the nose of your airplane).
You see, if the pressure line is attached to the muffler and the engine
starts backwards, it will continue to run very nicely backwards.
The only problem is that the exhaust pipe becomes a venturi and your new
venturi (on the inside of your
beautiful airplane) becomes a smoking hot exhaust stack. Paint
burns good! I know this from experience.
That explains my ugly, fat test airplane somewhat, poor little guy. Starter-You
will need an electric
starter if you choose to pursue the use of the 4-cycle.
Hand flipping
a 4-cycle is tricky at best, especially if you like muffler pressure (or the
nose of your airplane to remain attached to the nose of your airplane).
You see, if the pressure line is attached to the muffler and the engine
starts backwards, it will continue to run very nicely backwards.
The only problem is that the exhaust pipe becomes a venturi and your new
venturi (on the inside of your
beautiful airplane) becomes a smoking hot exhaust stack. Paint
burns good! I know this from experience.
That explains my ugly, fat test airplane somewhat, poor little guy.
11.
Maintenance-
It is
imperative that the Saito valve lash be adjusted per the instructional manual
included with the engine. If the
valves are not checked for proper clearance, the output of the engine will
suffer! I would suggest checking the valve lash after break-in (I
bench run 2/3 gallon), and every 10 or 15 flights for the first three sessions.
After that I would check the valves after every 20 flights until there
appears to be no change. Most likely, no further adjustment will be necessary after
break in and the first few flying sessions, but it does not hurt to check.
Checking the valves takes about 5 minutes and can be done with the engine
in the airplane, so do it! As far
as my tips for adjusting the valves, tighter is not better, a fraction loose is
safer. Be aware that the valve springs on the Saito are EXTREMELY
light. If the gauge is inserted
with the lash too tight there is a chance that he valve will actually move a
little and give you the impression that the gauge fits in the gap. That being
said, the gauge should fit a touch loose. I
would say that there is almost no friction when the gauge is inserted.
This ensures that you have at least the gauge width (.005”).
.001” gap extra does not seem to hurt performance at all (that I can
tell). .001” to .002” too tight
WILL effect performance! In other
words, the performance fall off is much more drastic toward the tight side (much
more drastic). So in summation,
adjust the valves to “loose” on the supplied gauge.
“Loose” is defined as the gauge is touching both the valve and rocker
at the same time, but barely.
Why
a Four Stroke?
Long
Story short, I think there is something to it.
Not
only have I done nothing but fly patterns with little or no fiddling, there is
definitely something to the ability of the 4-cycle engine to improve the
characteristics of an airframe. Seriously.
It appears that the wings work better, and the flaps work better, you can
carry more weight, etc. than you can with a 2-cycle.
Don’t over read this as nitro induced madness, but there is definitely
something there.
In
a post on the Stuka Stunt Works Internet forum, I touched on a theory that has
been muddling about in my head about the performance of 4-cycle engine vs. a 2-
cycle, and how it behaves in hard corner. Howard
Rush challenged me to explain my theory and propose a physical solution.
First
of all, let me say that I do not feel I have the technical expertise required to
explain my theory in aeronautical terms, as that is not my field of expertise.
I will attempt to explain in terms of simple physics, and I admit the
factors may not be that simple. So
go easy…
The
hypothesis:
I
have witnessed airframes set up with a 4-cycle engine that are capable of a
harder corner, with a larger propeller, and further forward CG than an
equivalent 2-cycle engine.
Windy spoke of this in his development, and marveled at the fact that
airframes that were definitely nose heavy (compared to the same airframe that
was previously utilizing a ST 60) with a 4-cycle engine appeared to require no
real amount of tail weight to achieve the previous amount of hard corner.
I have also personally observed other 4-cycle planes that were running
excessively large propellers (up to 16”) that appeared to lose nothing in the
corner. The usual effect with the
2-cycle being that a larger prop on a constant nose moment gets progressively
harder to turn in a sharp corner in our small hemisphere.
I think we can all agree to this, being that the effect is created by
several factors (precession for example).
Why
would a 4 cycle have less resistance to a corner than a 2-cycle?
Is it possible that a 4 cycle engine translates power to the propeller in
such a way as to reduce a general resistance to a change in orientation (or
precession) over a 2-cycle engine?
My
theory is as follows:
An
engine is not applying torque the to blades of the propeller in a constant
fashion. Actually, torque is
applied in pulses of very short duration. The
prop is spinning due to inertia for the majority of the period of one cycle.
This is the effect just like a bullet traveling a long distance due to an
initial acceleration. The bullet
retains some of its energy over the length of its travel due to the engine
imparted in the barrel. The bullet
is actually losing energy as it goes along.
A
spinning propeller is actually resisting a change in orientation due to simple
mass (Precession) and is also resisting due to effective drag on the blades as
they attempt to proceed at constant pitch through a corner.
In effect, for an inside corner the top of the propeller disc is
traveling backwards and the bottom of the disc is trying to travel forward (I
know this doesn’t happen, but I am at the limitation of my vocabulary) while
all the time the blade is constant pitch.
In
a 2-cycle engine, the blades are affected by imparted force twice as often as a
4 cycle. The frequency of force
applied to the blades is twice the frequency of the 4-cycle, even though the
resulting average amplitude is equal. This
means that the 4-cycle propeller is “pin wheeling” twice as much as with a
2-cycle engine. If we were to
observe the actual speed of the aircraft in microscopic terms, the speed of the
aircraft is not constant; it is actually “pulsing” along.
With a 2-cycle engine the pulses are twice as fast (one combustion for
each 360 degrees of rotation), allowing a shorter distance of travel between
each moment of imparted force.
The
drag of the prop disc against the corner is elevated at the moment of
combustion. At that point, the
engine’s force is working against making a corner.
In
summary:
The
4-cycle plane would travel twice as far between each input of torque, allowing
less resistance to a change in orientation over the same distance.
The average torque imparted to air would be the same in that distance,
but at a much shorter period.
This
also shows how powerful the combustion cycle is in the 4-cycle.
It’s
a theory...
I
actually discussed this theory with a very old friend of mine who is a
motorcycle road racer, as he was fascinated with the fact that I was running a
4-cycle engine in a model airplane! Without
hesitation and with a very straight face, he said that type of theory is common
knowledge in the world of motorcycles. He
explained that there is a drastic difference in handling characteristics between
the hot 4-cycle and 2-cycle motorcycles in a hard corner.
For you see spinning mass plays a MAJOR role in the way a motorcycle
handles. He explained that similar
“freewheeling 4-cycle” theories have actually been presented in the
motorcycle world. Whether it is
true or not I thought the correlation was fascinating.
Summary
It
has been a gas, really.
|

National Champion Paul Walker
Paul showed up with his totally new P-51 design.
This design is powered by a Saito 56 4 stroke engine utilizing the Pat
Johnston manifold and venturi. |
We
shall see.
|