![]()
![]()
![]()
![]()
![]()
![]()
![]()
![]()
|
|
|
|
A Modern Model Finish
This article will attempt
to outline a finishing method that can be substituted for the old “dope and
tissue” method for finishing balsa models.
This is the method starting with a balsa airframe:
1.
The solid sheeted surfaces are finished with Minwax Polycrylic (PC) and
00 silkspan. PC is available at Home Depot and Lowes and comes in gloss, semi
and flat versions. I have always used the gloss version, and I do not know if
there are any advantages to the other versions. A quart cost about $10 and will
last for several airplanes. Minwax PC has several advantages due to the fact
that it is a water based acrylic. Being water based, it simply has very little
solvents and almost no stink. Being an acrylic makes it a UNIVERSAL undercoat
for just about any type of acrylic paint (all of the paints used in modeling are
acrylic). It dries in 24 hours, and once dried it takes on a character that is
very similar to hardened thin CA. Balsa impregnated with PC becomes ROCK HARD
(much like thin CA impregnated wood). It is really not necessary to use any
paper with the PC (Bill Wilson sees no advantage to it and he has performed side
by side strength tests),
At this point watch for a few different
conditions. One, that the entire weave of the silkspan is filled. If it is,
you should basically be able to sand all the silkspan wrinkles, edges, and
surfaces exactly the same. As opposed to dope, which is simply used to attach
the silkspan to the surface, the PC makes the silkspan totally solid. Each
individual layer is not longer unique,
2.
For strength, add a second layer of PC and paper to the nose. Re-coat
with a third coat after sanding the second coat. The
3.
For very small dings during the pre-primer stages I use plain old
spackling (not the light spackling). In small quantities I have never had any
shrinkage problems, especially when saturated with the PC. For fillets I use
Epoxolite or 5 minute epoxy depending on the size of the fillet. Blend sand the
Epoxolite on the PC, you will notice the PC hardness will give you more freedom
to be aggressive without cutting into the wood, but still watch carefully. DO
NOT overcoat the finished fillets with a coat of PC.
4. For open bays use medium Sig silkspan or Polyspan (available from Tom Morris) and filled with three coats of nitrate dope with zinc stearate. This is the slowest step in the entire process. On my designs I have no open bays, which eliminates the needs for dope altogether. I have tried PC on open bays, and I have yet to make it work. Bill Wilson does, and he is very happy with it. Bill’s preferred method is to apply the Polyspan to the open bays using Balsarite adhesive and a hot iron. Once the fabric is fastened to the airframe and the open bays shrunk with the iron, the weave of the Polyspan is sealed with two coats of PC. From that point the rest of the airplane is finished as normal. 5. The next step is to shoot the entire plane in auto primer. Typically, I use inexpensive “lacquer primer surfacer” from English Auto Supply (a local Dallas body shop supply chain). Every auto supply has basically the same lacquer based primer surfacer. Despite the fact that this primer is lacquer based, I absolutely recommend using only urethane reducer in the primer. I only use Omni urethane reducer (this is the same reducer I use in the clear-see below). Omni reducer comes in four heat ranges, which include fast, medium, slow, and super slow. For primer I would recommend starting with medium and thin the first coat 2 to 1 to 1 ½ to 1 (for over 90 degrees try the slow). The second coat can be thinned closer to 2 1/2 to 1, depending on how much is left to fill. The first coat is sanded dry (DRY! ALWAYS DRY!!! NEVER EVER WET SAND!!!!) with 180 open coat paper. The second coat is sanded with 180 and finished with 320 open coat.
SANDING THE PRIMER How to sand filler coats may be the single biggest misconception in finishing. The goal is to obtain a uniform coat of primer. The idea is to get it so thin there is no real weight penalty. If you sand gray auto primer until you can almost read small newspaper print through it, it is PRETTY DANG THIN. I don't care if you shot on your primer an 1/8" thick, if you keep sanding it down until it is uniformly semi-transparent there can't be a lot of weight there. Applying primer is really pretty simple. Make sure you put enough on to fill every imperfection you can see or you will just end up sanding and re-shooting again. Put on enough coats with the material thick enough to fill. This is a different philosophy than the “dust on a coat and sand, dust on a coat and sand” philosophy that the dope guys use. As far as the level of fill, your mileage may vary depending on the type of primer used. The PPG K-36 requires 2-3 full coats to fill every bit of the wood grain in a well-prepped model. Lacquer primer surfacer can typically do that in one coat with some spot work here and there. Catalyzed primer does has a shrinkage advantage, which is nice because you hope that all that sanding will be not be in vain once the first coat of clear is applied.
Now it is time to remove the 180 scratches, as much excess primer as possible, and bring the primer coat down to a uniform thickness. Switch to 320 and sand all of the more opaque spots until the surface is as uniformly NEARLY transparent as possible. Only sand the opaque areas. Stay away from the transparent areas! You should be sanding in very small strokes or circles at this point and being very specific about where you are removing material. Sanding in long strokes will only serve top break through the more transparent areas. Then, switch to 400 and take the surface down one more level of transparency (this only takes seconds). At this point there is a layer of primer so thin that 5 more strokes of 400 grit would bust through the surface. You seriously can't get it any thinner. Busting through the surface is a very bad thing, and accomplishes nothing. These areas will inevitably swell with the clear and just show the imperfections. So it does no good to "sand it all off"! This is a huge misconception about the use of primers (including sanding sealer or dope and talc). Sanding the primer until only little slivers of gray are left in the wood grain is not a “coat”. If you sand this far you have effectively removed the entire coat, so why bother? There must be an unbroken LAYER of primer remaining. I think most would be better served to err on the side of a slightly more opaque stopping point than more transparent. More opaque means there is less chance for dissimilar surfaces, which leads to swelling. The difference in weight in two shades more opaque is most likely not even a factor in the final analysis.
6.
For the color coats use 1 to 1 non-catalyzed polyester basecoat. Common
types are Dupont Chromabase or PPG Omni for a good, not too expensive solution.
I use Omni, PPG and Valspar (mostly Valspar). A lot of people are truly
confused about the function of the basecoat part of the basecoat/clearcoat
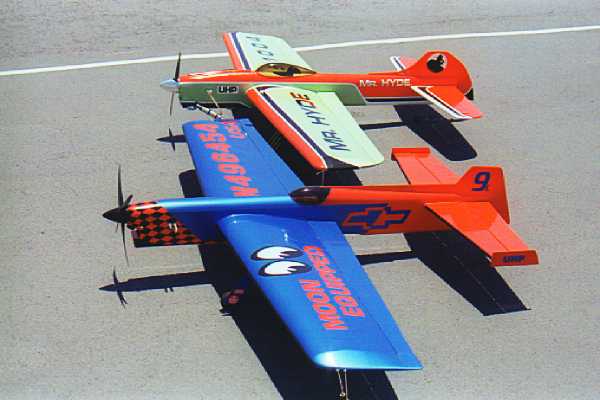
process. A lot of talk is made of auto clears but there seems to be
The best thing about auto color coats is that they come in every color under the rainbow. I often pick colors by using specific models and makes of cars. My latest model is VW Bug Cyber Green and BMW Flare Red. 7. I use 3M blue vinyl masking tape for sharp edges. I use regular masking tape for all others. I recommend 3M/Scotch-brand masking tape only. I also use a 3M paper/mask dispenser that I bought at the Sherwin Williams home painting store. Please, do yourself a favor and drop all the newspaper and tinfoil masking and go the system used by every serious car painter in the world. I recommend that every human being on the planet purchase a tape/paper dispenser. There simply is no substitute. The paper rolls (I use the 9” paper rolls myself) can be found at home Depot or Lowes’ and are definitely worth the $1.50 per roll price. I told everybody about the 4 ½ hour paint job Doug Moon and I did on my 2002 Nats plane the Shear Panic. I believe the paper/mask dispenser was one of the factors that made that kind of speed possible.
The real function of the reducer in the clear is
to give the modeler a chance at a light clear coat. We are painting model
airplanes after all not cars, so a thick heavy coat of clear, (while desirable)
is not practical. Urethane auto clears are “high solids”. High solids content
simply refers to the fact that there is actually more material in the can and
less solvents (epoxy,
I have been doing pretty well with using “one slower” reducer when thinning the clear if a slow hardener is not available. So, for example, if the temperature calls for medium reducer (70 deg.-80 deg.) I use the slow (80 deg. -90 deg.). Don’t get cute and think that using a super slow reducer when it is 60 degrees will result in a finish that looks like a mirror. Most likely you only succeed in trapping the solvents in the first coat and “popping” the surface with the second, which will result in a bunch of tiny little air bubbles to appear in the surface.
3 oz of clear, 3 oz of reducer for a total of 6 oz in the gun will do a Nobler sized plane if the overspray is kept to a minimum. The result will typically be a 1.5 oz clear coat (see note). The first coat is shot semi-gloss, the second is shot a little wetter. Allow 10-15 minutes in between to let the reducer gas off out of the previous coat. Don’t try to fix all the orange peel until you give the material 10 minutes to flow, you might be surprised how much it will. The 2 to 1 clear is just so much easier to shoot and seems to not want to run if "stacked" like the 4 to 1 clears. Not to mention the shine is at least triple. Note: If a clear is a 2 to 1 mixture it is typically 60% solids (thank the EPA). Using a gravity fed "HVLP compliant" Harbor Freight gun, which averages about 75% of transfer, 75% of 60% of the weight of the clear (actual clear, not reducer) will end up on the airplane. Using rough numbers, 50% of the clear in the gun will end up on the plane. I found that this does definitely work in practice. When shooting my profile P-Force I used the 6 oz mixture and 50% of 3 oz ended up on the airplane, so the clear weighed about 1.5 oz. The mistake I made in the past was not thinning the clear enough to allow the material to flow out nicely (or cover the area). This is not a car, after all, and 50% of what is needed on a car is still quite a lot of clear. When I first started using the auto clears (read that ”did not have a clue”) I typically used a lot of material to try to get the material to "lay out". I shot 12 oz of unthinned clear on my Oriental. I wish I could go back and do that again. My guess is that clear job weighed about 5-6 oz. People who are used to shooting dope, which is closer to 10% solids will typically shoot WAY TOO much of a high solids clear. Using logic, one coat of a premium 2 to 1 clear is equal to 6 coats of dope at FULL STRENGTH. Which, by my numbers, equates very nicely to about what the dope guys end up shooting on a plane (10 to 15 coats-Windy uses a quart on a plane). The difference being that two coats of thinned urethane clear will lay flat and will only need rubbing if you are a true aficionado. Most guys would be sufficiently impressed with "OEM" car shine. All of the urethane auto clears are extremely fuel proof. I typically run as high as 30% nitro in my 4 cycle engines. Even with these high nitro fuels, if spilled directly on the finish, have no effect. I regularly clean my airplanes with alcohol, and I have even used lacquer thinner for spot cleaning. Needless to say, an airplane with urethane auto clear will keep its gloss for years and years, long after a dope job has faded and dulled. 9. Sanding and buffing auto clear is really no different than sanding and buffing dope clear, except for the fact that the auto clear will already be glossy when you start and the buffing compounds may be slightly different. The beauty of the gloss clear is that it is not necessary to buff every square inch of the airplane, which is typical in a dope clear job, because the material is already shiny. It is amazing how little sanding and buffing required to have people convinced that you sanded and buffed the entire plane. I always sand and buff the top and bottom of the wing, but I don’t necessarily buff the flaps. The top of the fuselage definitely takes priority over the bottom, etc. I try to get my clear to lay out flat enough that sanding and buffing is simply something to do if I get bored, but very few people notice a huge difference. The clear is wet sanded in the usual manner, starting with wet 3M 1000 grit Wet or Dry (this is the only time that wet sanding is appropriate in this method), commencing to 1500 and then even 2000 if you wish (not really necessary). Once the surface is flat, machine or hand-rub using 3M Rubbing Compound. You will find that the 3M Rubbing Compound will do the bulk of the smoothing and shining work and the surface will be almost back to the original level of shine when completed. Progress to 3M Micro-Finishing Compound (this material is best used with a machine) and the surface should be back to the original level of shine. For appearance judging a quick rubbing with 3M Finesse-It will really wow ‘em. EQUIPMENT:
http://www.harborfreight.com/cpi/ctaf/Displayitem.taf?itemnumber=43430 This is the gun that started the gravity feed revolution for the Texas stunt community. Bill Wilson was using one of the several variations at his body shop and after Steve and Doug Moon and I used it, we had to have one. I bought one, the Moons bought theirs, and I got one for Al Rabe, which he gave to Frank McMillan, and so on, and so on... This gun, as well as all gravity feed type guns, is capable of shooting paint at very low pressures (around 10 to 5 psi depending on the viscosity of the material). Since it does not rely on the air pressure to feed the paint to the nozzle, overspray is truly minimized. The transfer rate of the gun is approximately 75%. Not to mention the fact that the cleaning of the gun is truly light years ahead of the cleaning process required for a suction feed gun. I recently added a "clear only" full sized gun and
a Harbor Freight detail gravity feed gun for painting trim colors. The trim gun
works very well for the task of shooting masked areas as it naturally shoots
very "dry", which is perfect for basecoat. It was on sale for $34.95 with the
regulator and I just could not turn it down.
I would also recommend a filter unit for your air supply to eliminate the oils and water vapor that can end up in your paint. They can be had real cheap at Harbor Freight, though (under $30). http://www.harborfreight.com/cpi/ctaf/Displayitem.taf?itemnumber=42035 I would recommend putting the filter unit as close to the gun as possible. I actually mount mine right after the compressor unit and make sure to keep my hose short enough that there is not a lot of condensation in the feed line. If you choose to not use a full size regulator/filter unit I would suggest a disposable filter/water trap that can be attached to the base of the gun. These can be found at your local auto body store.
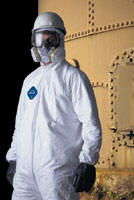
Safety: There are a lot of discussions about the potential safety hazards surrounding the catalyzed urethane paints, especially the auto clear coats. Years ago, when the Imron series of paints from Dupont were popular (a particularly hazardous paint system), there were several horror stories going around the control line stunt community. In following with these stories there were a lot of half-truths and misconceptions bantered about. Hopefully, some of that will be clarified here. The first misconception is that any painting system is “safe”. There are simply no solvent-based painting systems that do not require proper protections. Without the proper breathing apparatus and protection from skin exposure all of the paints and glues used in modeling are unsafe to a certain degree (excepting the maybe aliphatic glues and their cousins). Dope systems are certainly not immune to safety concerns, as well as epoxies, enamels, and cyanocrates. One of the main factors in evaluating whether a system is safe or unsafe is exposure time. This is one the most overlooked factors when comparing the hazard in each system. There are certainly addition chemical hazards when dealing with the clear stage of the auto paint systems, but the exposure times are so much drastically smaller in comparison to say, a dope system, that the case could be made that, in the end, the auto system is actually more safe. For example, for say a .60 sized stunt ship, a dope clear job would typically consist of one to two quarts of reduced material. This would typically require anywhere from 5 to 10 sprayed coats. If each coat requires 20 minutes of spraying time, the total exposure would be roughly from 2 to 4 hours. In comparison, for a .60 sized stunt ship, I typically spend about 10 minutes spraying the tack coat of auto clear and probably 10-15 minutes on the second wet coat (there is a lot more watching and looking on the final coat). Typically I only fill the spray gun with 6 to 18 oz of reduced material (depending the size of the airplane and the “high zootness” of the paint job). Due to this fact, it is easy to see that the total amount of atomized paint floating around in the air is drastically less with the auto clear. As far as the safety of the total system outlined in this article, the exposure to any hazardous chemicals has been minimized. There is minimal exposure during the Polycrylic stages. I seldom feel the need to wear a mask and my wife never complains of the stink in the house, so the largest portion of the finishing process is spent with no stink at all. The primer stages are relatively quick, as only two coats are required, one rough and one final, and both of these could be accomplished in the same day if one is diligent. The basecoat colors are really quite benign, and have a smell similar to Red Devil Enamel. Since they gas off so quickly and use such mild solvents, skin exposure risks are also relatively mild. The clear is the most obvious health hazard, but the exposure is so short I feel the tradeoff is well worth it.
http://www.3m.com/occsafety/pdfs/respirator1.pdf This is the “nuts and bolts” of the article. Misconception No. 1: Air-purifying respirators should not be used because diisocyanates have poor warning properties. Although OSHA specifically permits change schedules in lieu of sensory warning properties, some health and safety professionals argue this is not a safe practice. They believe diisocyanates could enter a facepiece through a spent cartridge or defect (e.g., a torn exhalation valve), and the user would be unaware, risking prolonged exposure. Misconception No. 2: Air-purifying respirators cannot remove diisocyanates.
Misconception No. 3: Air-purifying respirators are not approved for gases and vapors with poor warning properties. NIOSH supports OSHA’s requirement for change schedules and recommends against relying on warning properties. In addition, NIOSH recently directed respirator manufacturers to change the cautionary language on cartridge and canister approval labels and user instructions to be consistent with 1910.134. Specifically, the statement “do not wear for protection against organic vapors with poor warning properties or those which generate high heats of reaction with sorbent” must be changed to “follow established cartridge and canister change schedules or observe ESLI to ensure that cartridges and canisters are replaced before breakthrough occurs.”
|
|
|
 This
method was outlined to me at the 2001 Dallas Stunt Symposium by the Fort Worth
finishing guru Bill Wilson. I have taken Bill’s method and added a few
extremely minor twists, but for the most part it is Bill’s methodology and
method, and I am just a humble, humble, student of the Master. I could have
never figured out any of this stuff on my own.
This
method was outlined to me at the 2001 Dallas Stunt Symposium by the Fort Worth
finishing guru Bill Wilson. I have taken Bill’s method and added a few
extremely minor twists, but for the most part it is Bill’s methodology and
method, and I am just a humble, humble, student of the Master. I could have
never figured out any of this stuff on my own. 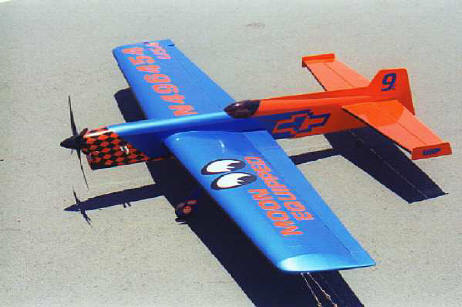 but I
have found that, for my uses, it is truly wonderful over sheeted surfaces when
used with thin silkspan. Using 00 silkspan in conjunction with the PC helps to
level the surface at application. To attach the silkspan, first wet the surface
with the Polycrylic (there is no need to pre-coat the surface like a dope
application). I use the same types of brushes that I use with dope. WHILE THE
PC IS STILL WET apply the slightly water dampened silkspan. Once all the edges
have been pulled and the wrinkles are all pulled out, trim the edges of the
silkspan. Once trimmed, wet the entire surface of the silkspan with a coat of
PC. Make sure to do the entire surface evenly and get all of the edges. At
this point it is possible that there may some “relaxation” in the part,
especially for long flat parts like flaps, but no need to worry. Typically, the
relaxed parts will return right back to their former shape upon drying. For
added security, a good method is to lay the “tack free” drying parts on a sheet
of Teflon on a flat surface and weight down slightly. This will basically
guarantee that the parts will dry DEAD FLAT and will not warp in the future.
Subsequent coats will have little, if any effect. Let this first coat dry for a
minimum of 24 hours and begin DRY sanding the surface with 180 grit ADHESIVE
BACKED 3M OPEN COAT paper.
but I
have found that, for my uses, it is truly wonderful over sheeted surfaces when
used with thin silkspan. Using 00 silkspan in conjunction with the PC helps to
level the surface at application. To attach the silkspan, first wet the surface
with the Polycrylic (there is no need to pre-coat the surface like a dope
application). I use the same types of brushes that I use with dope. WHILE THE
PC IS STILL WET apply the slightly water dampened silkspan. Once all the edges
have been pulled and the wrinkles are all pulled out, trim the edges of the
silkspan. Once trimmed, wet the entire surface of the silkspan with a coat of
PC. Make sure to do the entire surface evenly and get all of the edges. At
this point it is possible that there may some “relaxation” in the part,
especially for long flat parts like flaps, but no need to worry. Typically, the
relaxed parts will return right back to their former shape upon drying. For
added security, a good method is to lay the “tack free” drying parts on a sheet
of Teflon on a flat surface and weight down slightly. This will basically
guarantee that the parts will dry DEAD FLAT and will not warp in the future.
Subsequent coats will have little, if any effect. Let this first coat dry for a
minimum of 24 hours and begin DRY sanding the surface with 180 grit ADHESIVE
BACKED 3M OPEN COAT paper. 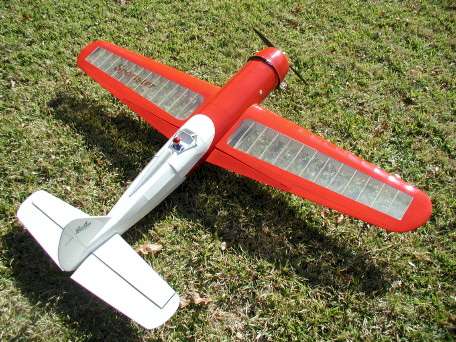 like when you use dope. The
silkspan simply serves as a very thin sponge to accept the liquid plastic. Once
the weave is filled the silkspan is fully impregnated with plastic. I use
double layers of silkspan over edges that are not quite perfect, fill them with
PC and sand it all down flat, so the paper and PC works like a filler. The PC
will sand with some work. Remember it is HARD STUFF, but hard is good
for balsa airplanes, especially for a base coat. Second, you will notice that
the paper will cut all of the surfaces about the same because the PC has served
to make all of the surfaces of a uniform hardness. Glue edges will be the same
hardness as punk balsa. This is a good opportunity to do the final shaping on
joints and flatten everything out and get rid of the ridges that can appear on
edges of dissimilar hardness (I really love this part of the process and I like
to spend a little extra time here). Lastly, if you do see an edge appear in the
silkspan as you are sanding YOU DID NOT FILL THE PAPER (it will appear
white if it is not filled). Re-coat that area and all other dry areas and sand
the next day.
like when you use dope. The
silkspan simply serves as a very thin sponge to accept the liquid plastic. Once
the weave is filled the silkspan is fully impregnated with plastic. I use
double layers of silkspan over edges that are not quite perfect, fill them with
PC and sand it all down flat, so the paper and PC works like a filler. The PC
will sand with some work. Remember it is HARD STUFF, but hard is good
for balsa airplanes, especially for a base coat. Second, you will notice that
the paper will cut all of the surfaces about the same because the PC has served
to make all of the surfaces of a uniform hardness. Glue edges will be the same
hardness as punk balsa. This is a good opportunity to do the final shaping on
joints and flatten everything out and get rid of the ridges that can appear on
edges of dissimilar hardness (I really love this part of the process and I like
to spend a little extra time here). Lastly, if you do see an edge appear in the
silkspan as you are sanding YOU DID NOT FILL THE PAPER (it will appear
white if it is not filled). Re-coat that area and all other dry areas and sand
the next day.  nose
will be nice and shiny and ROCK HARD! I have found that the PC prepared nose is
harder and more dent resistant than even a nose finished in fiberglass and
epoxy, and there is no weave to appear later. It is also a good idea to re-coat
at the fillet areas (we have no fillets at this point). Make sure that area
gets good and shiny also. This allows you to sand the final fillets without
gouging the wood, as the shiny areas will be extra hard. Please don’t go crazy
with the PC at this point. One coat of PC is equal to about 4 coats of
unthinned dope. Too much all over will add up, so why do it? A fully sheeted
plane with two good coats should appear to have a slight “plastic” look. The
nose should absolutely look like it is fully “plasticized”.
nose
will be nice and shiny and ROCK HARD! I have found that the PC prepared nose is
harder and more dent resistant than even a nose finished in fiberglass and
epoxy, and there is no weave to appear later. It is also a good idea to re-coat
at the fillet areas (we have no fillets at this point). Make sure that area
gets good and shiny also. This allows you to sand the final fillets without
gouging the wood, as the shiny areas will be extra hard. Please don’t go crazy
with the PC at this point. One coat of PC is equal to about 4 coats of
unthinned dope. Too much all over will add up, so why do it? A fully sheeted
plane with two good coats should appear to have a slight “plastic” look. The
nose should absolutely look like it is fully “plasticized”. 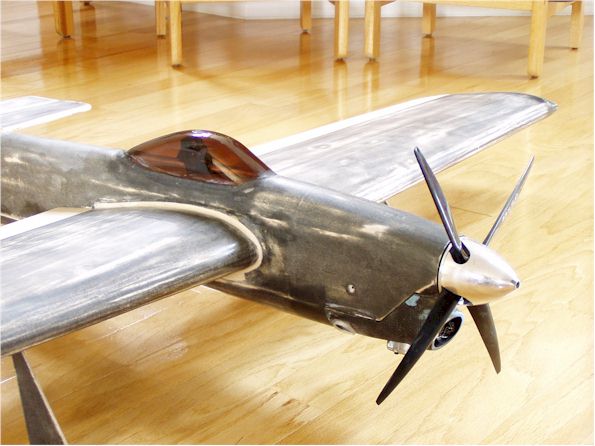 I
have found that PC over Epoxolite is a dicey proposition, so don’t do it!
Wait to overcoat the fillets with the primer.
I
have found that PC over Epoxolite is a dicey proposition, so don’t do it!
Wait to overcoat the fillets with the primer.  There
is really no comparison between the lacquer primer combined with lacquer thinner
and the same primer combined with urethane reducer. The less aggressive
urethane reducer allows the primer to “stack”. A stacked surface appears almost
shiny and will appear very flat with a very thin coat, also it will shrink less
and absorb less weight of the color and clear coats. A stacked coat will also
sand like it is very thick even when it is not, and it will also allow the clear
to shine more. Faster drying, more aggressive lacquer thinners have a tendency
to create a primer surface that is more like a “forest of trees”, if you will.
The trees are all standing up and it takes an incredible amount of material to
fill up to the top of the trees. The primer used with urethane reducer is more
like a forest with all the trees laying their sides or “stacked” like bricks in
a wall. A stacked surface will fill faster and retain its “holdout” (the
ability of the primer to resist shrinking and swelling at the application of the
clear) better through the final coats. Also, the slower reducers will allow the
surface to flow out smoother, even though they also require a little more time
to dry also (most lacquer based primers are sandable in about an hour).
There
is really no comparison between the lacquer primer combined with lacquer thinner
and the same primer combined with urethane reducer. The less aggressive
urethane reducer allows the primer to “stack”. A stacked surface appears almost
shiny and will appear very flat with a very thin coat, also it will shrink less
and absorb less weight of the color and clear coats. A stacked coat will also
sand like it is very thick even when it is not, and it will also allow the clear
to shine more. Faster drying, more aggressive lacquer thinners have a tendency
to create a primer surface that is more like a “forest of trees”, if you will.
The trees are all standing up and it takes an incredible amount of material to
fill up to the top of the trees. The primer used with urethane reducer is more
like a forest with all the trees laying their sides or “stacked” like bricks in
a wall. A stacked surface will fill faster and retain its “holdout” (the
ability of the primer to resist shrinking and swelling at the application of the
clear) better through the final coats. Also, the slower reducers will allow the
surface to flow out smoother, even though they also require a little more time
to dry also (most lacquer based primers are sandable in about an hour).
 The first
part of the sanding process is to “block” the large flat surfaces. I bust the
surface with 180 grit and sand until the very first transparent spots start to
appear and then I move on. Sand in larger strokes across the known imperfections
as much as possible. At this stage you will start to see the major
imperfections (such as wood grain) disappear as you sand. Once the entire
surface is done to this level you should see semi-transparent spots periodically
but the surface should still be opaque.
The first
part of the sanding process is to “block” the large flat surfaces. I bust the
surface with 180 grit and sand until the very first transparent spots start to
appear and then I move on. Sand in larger strokes across the known imperfections
as much as possible. At this stage you will start to see the major
imperfections (such as wood grain) disappear as you sand. Once the entire
surface is done to this level you should see semi-transparent spots periodically
but the surface should still be opaque. 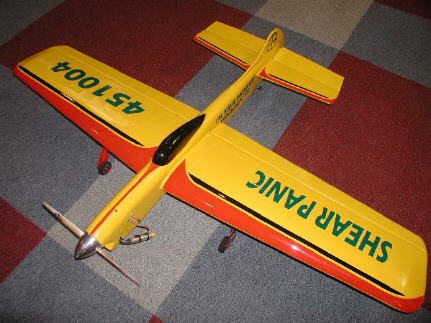
 All
of the major paint companies offer a “premium” 2 to 1 clear. You could
substitute PPG or Dupont, and in particular PPG’s bargain line of paints
called Omni has a very nice 2 to 1 clear that is very suitable to our
application. I have also used 4 to 1 clears, including Chromaclear and
Valspar and they behave exactly the same as each other. I like the 2 to 1
clears better. When I first started using the clears myself, Bill Wilson
happened to give me the Matrix clear, as it was a sample from a sales rep. I
would have normally been using Valspar brand, because that is what Bill uses,
but I took home the Matrix clear and that is what I have been using ever
since. In fact, I have grown to really love the Matrix clear, as it performs
wonderfully and is priced very reasonably, at nearly half the cost of
Chromaclear.
All
of the major paint companies offer a “premium” 2 to 1 clear. You could
substitute PPG or Dupont, and in particular PPG’s bargain line of paints
called Omni has a very nice 2 to 1 clear that is very suitable to our
application. I have also used 4 to 1 clears, including Chromaclear and
Valspar and they behave exactly the same as each other. I like the 2 to 1
clears better. When I first started using the clears myself, Bill Wilson
happened to give me the Matrix clear, as it was a sample from a sales rep. I
would have normally been using Valspar brand, because that is what Bill uses,
but I took home the Matrix clear and that is what I have been using ever
since. In fact, I have grown to really love the Matrix clear, as it performs
wonderfully and is priced very reasonably, at nearly half the cost of
Chromaclear. 
 This little guy is great for dry
coats of small trim, or simply freehanding a camouflage job on your semi-scale.
It is capable if a fan varying from 1/8" to about 3", and could be used as a
main gun, but it would be SLOW GOING. I would recommend buying the big gun
first.
This little guy is great for dry
coats of small trim, or simply freehanding a camouflage job on your semi-scale.
It is capable if a fan varying from 1/8" to about 3", and could be used as a
main gun, but it would be SLOW GOING. I would recommend buying the big gun
first.  I have had several people ask me
about buying a compressor unit, as it seems to always be the first step to
becoming a full time spray painter. I have a Cambell-Hausfeld 3 hp/110 V single
stage with a 20-gallon tank that I bought Wal-Mart more than a several years
ago. This compressor is really more than enough for any painting operation I
have ever done, and is adequate for most body shop and mechanic's air tools. It
is really not necessary to go quite this big for painting alone. Harbor Freight
has a good 2 hp pretty cheap (under $110).
I have had several people ask me
about buying a compressor unit, as it seems to always be the first step to
becoming a full time spray painter. I have a Cambell-Hausfeld 3 hp/110 V single
stage with a 20-gallon tank that I bought Wal-Mart more than a several years
ago. This compressor is really more than enough for any painting operation I
have ever done, and is adequate for most body shop and mechanic's air tools. It
is really not necessary to go quite this big for painting alone. Harbor Freight
has a good 2 hp pretty cheap (under $110). 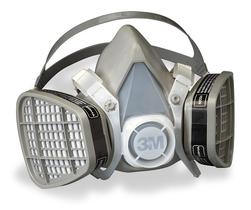 I just so happened to buy a new
organic vapor mask, (a 3M silicone half faced model) so I took the opportunity
to call the 3M Technical Service Line to get the 411 on the effectiveness of
organic vapor “carbon masks” on diisocynates. Diisocyanates are the most
hazardous chemicals present in the auto clears. Much to my surprise, despite
what we have been told in the past, carbon based filter cartridges are
completely affective against these chemicals, even more so than most solvents.
The use of “fresh air systems” is not even advocated by OSHA under normal
conditions. The only reason fresh air systems were EVER advocated for
diisocynates was because there were no “warning signs” for these chemicals (like
a smell). You can read the whole article here.
I just so happened to buy a new
organic vapor mask, (a 3M silicone half faced model) so I took the opportunity
to call the 3M Technical Service Line to get the 411 on the effectiveness of
organic vapor “carbon masks” on diisocynates. Diisocyanates are the most
hazardous chemicals present in the auto clears. Much to my surprise, despite
what we have been told in the past, carbon based filter cartridges are
completely affective against these chemicals, even more so than most solvents.
The use of “fresh air systems” is not even advocated by OSHA under normal
conditions. The only reason fresh air systems were EVER advocated for
diisocynates was because there were no “warning signs” for these chemicals (like
a smell). You can read the whole article here.